NOTE 020 - DIY Distressed Vintage Inspired Note Cards
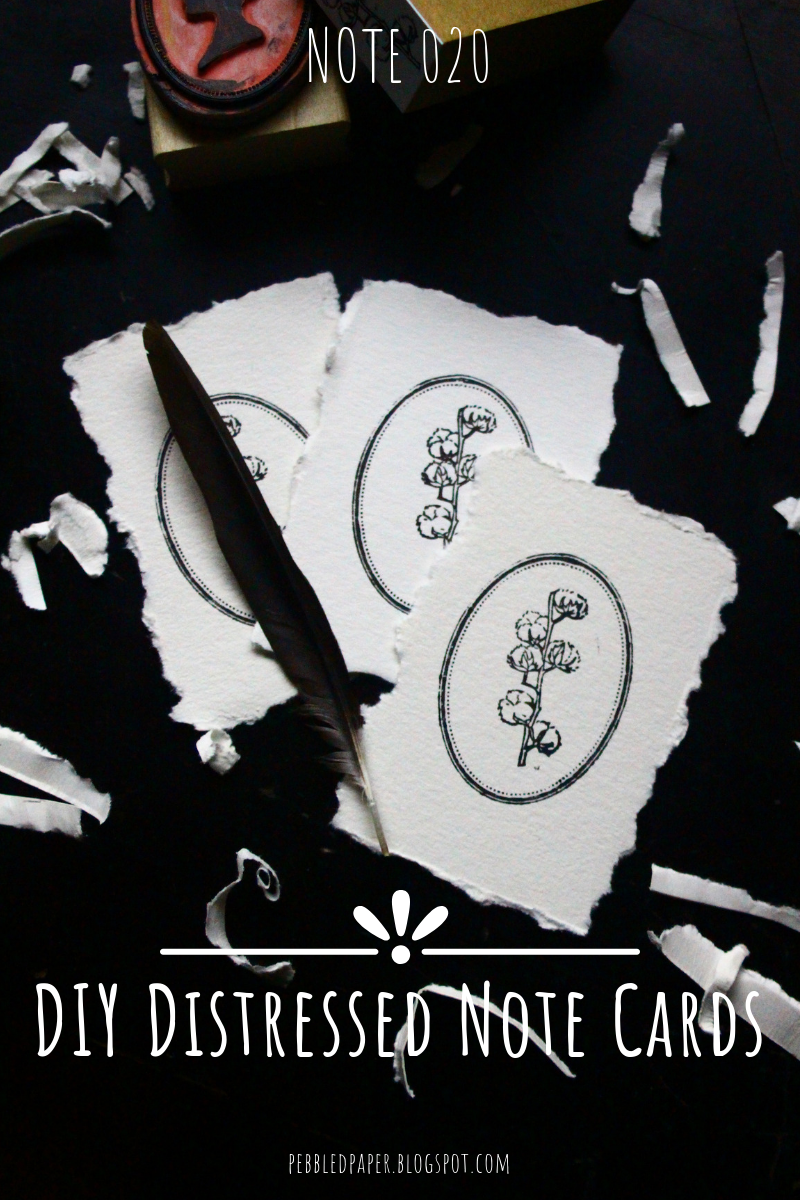

DIY Distressed Vintage Style Stamped Note Cards
These little cards are so easy to make & can be made in different
styles. The ripped edges add a luxe vintage feel to these cards.
You could use different colored stamp inks to make these match
the occasion. These would also make great gift tags!
I used a black background this time. I love the dramatic feel in these
photos. I loved making this tutorial so much! These tags really matched
my personal style & they are really easy to make. You could forgo the
stamps & do some calligraphy on them. I also thought it would be cool
to use a wax seal on them. These make perfect gift tags if you just punch
a hole in them & add a string.
I have a mail coming up that will feature these. I will definitely be using
more of these in the future. I've known how to do paper like this for a while,
more of these in the future. I've known how to do paper like this for a while,
but suddenly it just popped back into my head. I thought I would make
it into a tutorial.
I took a lot of photos... I loved these soo much. (lol paper love)
__________________________________________________
Materials:
Watercolor Paper - I use this watercolor paper. It is thicker than cardstock,
but not too thick. I like the slightly rough texture of the paper which really adds
to that vintage luxe feel. This paper tears beautifully as well which is important.
You could use another paper, but the fibers in the paper are important for those
beautiful tears.
You could use another paper, but the fibers in the paper are important for those
beautiful tears.
Stamp Ink - I am using VersaMagic Dew Drop in Midnight Black.
Stamps - You can use any stamps you would like. I used the frame off of one of my
stamps. I also used the Yumi Imai Cotton Rubber Stamp.
Ruler or Yardstick - You will need something to measure the paper with as well as hold
the paper down when you rip it. This is important to keep it from ripping the paper
to far in.
A Table: We will use the edge of a table or surface to help us in ripping the paper.
You can use calligraphy on these, wax seals, or even make gift tags from them.
Get creative!

Step 1: Figure out what size you need.
You will want to add a bit more length to your base size. I recommend
adding 1/4 inch or about 1 cm. We want that extra material to tear off
so we can create those beautiful ripped edges.
I made mine a rectangle that is 3 1/4 inches long & 2 1/4 inches wide.
(8.3 cm X 5.8 cm)
I marked my sizes & cut them out.


Step 2: Position your paper
Position the paper where what you want to rip off is hanging over the edge of
your table. Then lay your ruler or yard stick on the edge of the table. We
want it lined up with the table's edge. As you can see in the photo above,
my paper is sandwiched between the table and my ruler. The edge of the paper
I want to rip off is hanging over the edge. Hanging the paper we want to tear
off over the edge makes the process a lot easier.


Step 3: Rip your paper!
Place your weight on the ruler so that when you rip it the ruler will keep the
paper in place as well as guide your tears. It doesn't have to be perfect.
Tear the paper upwards. It looks better to have it rough side down when you
tear the paper. It doesn't really matter, but I seemed to like the tears better
when I did it that way. Do this same process to all edges. By the way, I couldn't
hold the ruler down, tear the paper, & take a photo at the same time.
hold the ruler down, tear the paper, & take a photo at the same time.
(This may tear up your nails & fingertips... it did mine a bit.)


Then you are left with your lovely cards!
You can now decorate them!

You can also reuse the paper you tore off as confetti or packaging!


I put stamp ink on the frame of a portrait stamp I had.
I then stamped this cotton stamp in the middle.
They are not perfect, but I love that the most about them.

Let me know how it went for you in the comments below!
Also, feel free to ask any questions down below!
Don't forget to subscribe & see how I used these in a snail mail!

Comments
Post a Comment